How to Make Chat Room In Html
PHP and jQuery In this tutorial with a simple web-based chat application will be created. The utility of such a direct support for your site would be perfect for the system.
Introduction
Final products
We will build the chat application will be much easier. Login and Logout of a system, AJAX-style features will include support for multiple users and also will offer.

Step 1: HTML markup
We called the index.php file by creating our first lesson will begin.
<! DOCTYPE HTML PUBLIC "- // W3C // DTD XHTML 1.0 Transitional // EN" "http://www.w3.org/TR/xhtml1/DTD/xhtml1-transitional.dtd">
<HTML xmlns = "http://www.w3.org/1999/xhtml">
<Head>
<Title> Chat - Customer Module </ title>
<Link type = "text / css" rail = "stylesheet in the" href = "style.css the" />
</ Head>
<Div's ID = "wrapper">
<Div's ID = "menu">
<P class = "Welcome"> There, in the <b> </ b> </ P>
<P class = "logout"> <a id="exit" href="#"> please exit </a> chat </ P>
<Div style = "clear: both"> </ div's>
</ DIV>
<Div's ID = "chatbox"> </ div's>
<Form name = "post" action = "">
<Input name = "usermsg" type = "text" ID = "usermsg" size = "63" />
<Input name = "submitmsg" type = "submit" ID = "submitmsg" value = "Submit" />
</ Form>
</ DIV>
<Script type = "text / javascript" src = "http://ajax.googleapis.com/ajax/libs/jquery/1.3/jquery.min.js"> </ script>
<Script type = "text / javascript">
// JQuery document
$ (Document) .ready (function () {
});
</ Script>
</ Body>
</ HTML>
We always DOCTYPE, HTML, head, and body tags start with our HTML. Head tag, we add titles, and our CSS stylesheet (style.css) to connect to.
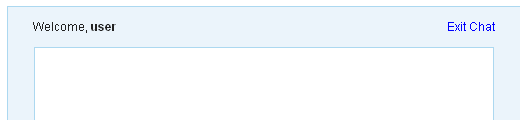
Inside the body tag, we structure our layout within #wrapper div. We will have three main blocks: a simple Menu, our chatbox, and our message input, each with its respective div and IDS.
#menu div elements will consist of two paragraphs. The first will be a welcome to the user and the float and the other will be an exit link and will float right. We also include a div elements to clear.
#chatbox div will contain our chatlog. We use jQuery's AJAX request from an external file will load our login.
Our #wrapper div last item in a text message to user input and a submit button will be included in our Form, will be.
We need our rapid growth of the last to load the page. For this tutorial we will be using the jQuery library as the first, Google will link to jQuery CDN. Where we will work on will be our second script tag. After the document is ready, we will load all of your code.
Step 2: CSS styling
/ * CSS Document * /
Body {
Font: 12px Arial;
Color: # 222;
Text-align: center;
Padding: 35px;}
Form, P, duration {
Margin: 0;
Padding: 0;}
Input {font: 12px Arial;}
A {
Color: # 0000ff's;
Text-decoration: none;}
A: hover {text-decoration: underline;}
#wrapper, #loginform {
Margin: 0 auto;
Padding-bottom: 25px;
Background: # EBF4FB;
Width: 504px;
Border: 1px solid # ACD8F0;}
#loginform {padding-top: 18px;}
#loginform P {margin: 5px;}
#chatbox {
Text-align: right;
Margin: 0 auto;
Margin-bottom: 25px;
Padding: 10px;
Background: #fff;
Height: 270px;
Width: 430px;
Border: 1px solid # ACD8F0;
Overflow: auto;}
#usermsg {
Width: 395px;
Border: 1px solid # ACD8F0;}
# The {width: 60px;}
.error {color: # FF0000;}
#menu {padding: 12.5px 25px 12.5px 25px;}
.welcome {float: right;}
.logout {float: right;}
.msgln {margin: 0 0 2px 0;}
We have set a style or class identity, something which will be added a little later than the other above is nothing special about CSS.

Now we apply our chat with short styling to make it look better than it will add some CSS. The code below will be included in our style.css file.
Step 3: To create a login form using PHP.
Now, before we continue to further their names will ask the user will implement a simple form.
<?
Property ();
Function loginForm () {
'Echo
<Div's ID = "loginform">
<Form action = "index.php the" method = "post">
<P> Please enter your name to proceed: </ P>
<= "Name" label> Name: </ label>
<Input type = "text" name = "name" ID = "name" />
<Input type = "submit" name = ID = "Enter" "ENTER" value = "enter" />
</ Form>
</ DIV>
';
}
If (a isset ($ _ POST) ['the']) {
If ($ _ Post ['name'] = "") {
$ _SESSION ['Name'] = stripslashes (htmlspecialchars ($ _ Post ['name']);)
}
Else {
Echo '<span class = "error"> name </ span> in the type;
}
}
?>
We created the loginForm () function of his / her user asks for the name consists of a simple login form. Then we entered a name that person to confirm that the use of a statement. Person entered a name, if $ _SESSION ['name'] as the set name. We called a cookie to store the session are using anything since before outputted to the browser, we session_start () must call.
You may want to pay close attention to one thing, we cross-site scripting (XSS) protection of the victim named variables, htmlspecialchars HTML entities which converts special characters () function is used . We also chat to login later be deployed in the event that will add a text variable.
 Showing the login form
A user is not logged in, and therefore not in a session to display the login form, we #wrapper div and script tags in your actual code around it and use a statement. On the contrary, they hide the login form, and the user is logged in and has created a session will show the chat box.;
Welcome to logout menu
We still chat login system for the application form are not finished. We still logging the user, and to end the chat session is needed to allow. If you can remember, our actual HTML markup included a simple menu. Go back to the menu that will give more functionality to add some PHP code.
First, the items include a welcome message to users. We do not write the username session.
1
<P class = "Welcome"> There, in the <b> <$ _SESSION php echo ['name'];?> </ B>
 // If the user submits the form
<?
Property ();
If (a isset ($ _ SESSION ['name'])) {
$ Text = $ _POST ['text'];
Of $ FP = fopen ("log.html", 'a');
of fwrite ($ FP, "<div class = 'msgln'> (" date ("G: I have a" ....) ") <b>" $ _ SESSION ['name'] "</ b> : ". stripslashes (htmlspecialchars ($ text))" Archives </ DIV> ");
The fclose ($ FP);
}
?>
Before we do this, we will use the user name as the session session_start () function to start post.php file.
'Name' is present for the session before doing anything else, you have to use isset boolean, we check.
We jQuery by now that the file being sent to capture the data. We store this data in $ text variable.
These figures, the overall user data as input, log.html file will be saved. To do this, we php.net opens the file for writing only in the 'A' fopen function, open the file with the mode, the file pointer at the end of the file. If the file does not exist, attempt to create it. Then we of fwrite () function using the file to write our message.
We will be writing to be enclosed within a .msgln div. The date and the date () function, the user name obtained through the session, and also to prevent XSS htmlspecialchars () function is sorrounded by the text, which will be included.
Finally, we turn to handle your file using fclose ().
Step 5: Start Chat (log.html) displaying content
User posted handle everything and posted using jQuery, PHP to communicate with the log is written. The only thing left to do to update the user has to show chat log.
If any content to save ourselves some time, we will preload #chatbox div chat log.
<Div's ID = "chatbox"> <PHP
If (file_exists ("log.html") && File ("log.html")> 0) {
The $ = fopen ("log.html", "R") to the handle;
Of $ contents = fread ($ handle, file ("log.html"));
The fclose ($ handle);
Echo $ contents;
}
?> </ Div's>
We are reading and writing the contents of the file, except this time, post.php file as we use a similar routine.
Application jQuery.ajax
AJAX request is the basis of everything we are. This application not only send us throught form without page allows you to get the data, but also allows the application to handle the data.
// Load the file containing the chat log
{) (LoadLog work
$ .ajax ({
URL: "log.html",
Cache: false,
Success: function (HTML) {
. $ ("# Chatbox") HTML (HTML); // Enter the chat log in #chatbox div
},
});
}
Our AJAX request we wrapped inside a function. You'll see why in a second. As you see above, we will use jQuery AJAX request three items.
URL: URL request string. Log.html our chat we will use for the log file name.
Cache: This saved file will prevent us from being. This is an application of the latest chat log will ensure that every send.
sucess: This will move the data to the application that will allow you to attach an event.
As you see, we #chatbox div so we requested data (HTML) move.
Auto Scrolling
In other chat applications can be seen as a chat log of container (#chatbox) If overflows scroll down automatically. We first AJAX request and compare the height of the container and feature a simple, are going to apply. Scroll height is greater after application, so influential in #chatbox div will use jQuery to scroll to.
// Load the file containing the chat log
{) (LoadLog work
Variable oldscrollHeight = $ ("# chatbox") attr ("scrollHeight") - 20 .; // Scroll height before application
$ .ajax ({
URL: "log.html",
Cache: false,
Success: function (HTML) {
. $ ("# Chatbox") HTML (HTML); // Enter the chat log in #chatbox div
// Auto-scroll
Variable newscrollHeight = $ ("# chatbox") attr ("scrollHeight") - 20 .; height after application // Scroll
If (newscrollHeight> oldscrollHeight) {
$ ("# Chatbox") animate ({scrollTop: newscrollHeight}, 'normal'); div to the bottom // Autoscroll
}
},
});
}
We oldscrollHeight we first before requesting combo #chatbox div height stored in the variable.
Since our application is successful return, we newscrollHeight scrolle of #chatbox div height stored in the variable.
We then described using a combo height compare both variables. newscrollHeight oldscrollHeight is great, so we use influential #chatbox div to scroll to.
Updated continuously chat
Now a new data being sent back and forth between customers how we will continuously update, which may arise? Or to rephrase the question, how we constantly updating data will keep sending requests?
setInterval (loadLog, 2500); // reload the file every 2500 ms or x-ms If you want to change other parameters
Our answer lies in setInterval function. Almost every 2.5 seconds, our loadLog () function will be executed, and loadLog div autoscroll function application and will update the file.
Finishes
We're finished! A basic communication system is how it works hope that you have learned, and if you have any suggestions on anything, I would gladly welcome them. You can get with a chat application as it is a simple chat system. If you ect, add emoticons, add an administrative backend, away from work and can build multiple chat rooms. The sky is the limit here.
The chat application that you're thinking of expanding may want to check if there are a few links:
Form to secure your forms with buttons - XSS (cross site scripting) and cross-site request forgery prevention prevent
Expanding on our AJAX request - jQuery Using submit a form without page refresh
With raw JavaScript to AJAX requests - how applications work behind the scenes with raw JavaScript learn how.
Introduction
Final products
We will build the chat application will be much easier. Login and Logout of a system, AJAX-style features will include support for multiple users and also will offer.
Step 1: HTML markup
We called the index.php file by creating our first lesson will begin.
<! DOCTYPE HTML PUBLIC "- // W3C // DTD XHTML 1.0 Transitional // EN" "http://www.w3.org/TR/xhtml1/DTD/xhtml1-transitional.dtd">
<HTML xmlns = "http://www.w3.org/1999/xhtml">
<Head>
<Title> Chat - Customer Module </ title>
<Link type = "text / css" rail = "stylesheet in the" href = "style.css the" />
</ Head>
<Div's ID = "wrapper">
<Div's ID = "menu">
<P class = "Welcome"> There, in the <b> </ b> </ P>
<P class = "logout"> <a id="exit" href="#"> please exit </a> chat </ P>
<Div style = "clear: both"> </ div's>
</ DIV>
<Div's ID = "chatbox"> </ div's>
<Form name = "post" action = "">
<Input name = "usermsg" type = "text" ID = "usermsg" size = "63" />
<Input name = "submitmsg" type = "submit" ID = "submitmsg" value = "Submit" />
</ Form>
</ DIV>
<Script type = "text / javascript" src = "http://ajax.googleapis.com/ajax/libs/jquery/1.3/jquery.min.js"> </ script>
<Script type = "text / javascript">
// JQuery document
$ (Document) .ready (function () {
});
</ Script>
</ Body>
</ HTML>
We always DOCTYPE, HTML, head, and body tags start with our HTML. Head tag, we add titles, and our CSS stylesheet (style.css) to connect to.
Inside the body tag, we structure our layout within #wrapper div. We will have three main blocks: a simple Menu, our chatbox, and our message input, each with its respective div and IDS.
#menu div elements will consist of two paragraphs. The first will be a welcome to the user and the float and the other will be an exit link and will float right. We also include a div elements to clear.
#chatbox div will contain our chatlog. We use jQuery's AJAX request from an external file will load our login.
Our #wrapper div last item in a text message to user input and a submit button will be included in our Form, will be.
We need our rapid growth of the last to load the page. For this tutorial we will be using the jQuery library as the first, Google will link to jQuery CDN. Where we will work on will be our second script tag. After the document is ready, we will load all of your code.
Step 2: CSS styling
/ * CSS Document * /
Body {
Font: 12px Arial;
Color: # 222;
Text-align: center;
Padding: 35px;}
Form, P, duration {
Margin: 0;
Padding: 0;}
Input {font: 12px Arial;}
A {
Color: # 0000ff's;
Text-decoration: none;}
A: hover {text-decoration: underline;}
#wrapper, #loginform {
Margin: 0 auto;
Padding-bottom: 25px;
Background: # EBF4FB;
Width: 504px;
Border: 1px solid # ACD8F0;}
#loginform {padding-top: 18px;}
#loginform P {margin: 5px;}
#chatbox {
Text-align: right;
Margin: 0 auto;
Margin-bottom: 25px;
Padding: 10px;
Background: #fff;
Height: 270px;
Width: 430px;
Border: 1px solid # ACD8F0;
Overflow: auto;}
#usermsg {
Width: 395px;
Border: 1px solid # ACD8F0;}
# The {width: 60px;}
.error {color: # FF0000;}
#menu {padding: 12.5px 25px 12.5px 25px;}
.welcome {float: right;}
.logout {float: right;}
.msgln {margin: 0 0 2px 0;}
We have set a style or class identity, something which will be added a little later than the other above is nothing special about CSS.
Now we apply our chat with short styling to make it look better than it will add some CSS. The code below will be included in our style.css file.
Step 3: To create a login form using PHP.
Now, before we continue to further their names will ask the user will implement a simple form.
<?
Property ();
Function loginForm () {
'Echo
<Div's ID = "loginform">
<Form action = "index.php the" method = "post">
<P> Please enter your name to proceed: </ P>
<= "Name" label> Name: </ label>
<Input type = "text" name = "name" ID = "name" />
<Input type = "submit" name = ID = "Enter" "ENTER" value = "enter" />
</ Form>
</ DIV>
';
}
If (a isset ($ _ POST) ['the']) {
If ($ _ Post ['name'] = "") {
$ _SESSION ['Name'] = stripslashes (htmlspecialchars ($ _ Post ['name']);)
}
Else {
Echo '<span class = "error"> name </ span> in the type;
}
}
?>
We created the loginForm () function of his / her user asks for the name consists of a simple login form. Then we entered a name that person to confirm that the use of a statement. Person entered a name, if $ _SESSION ['name'] as the set name. We called a cookie to store the session are using anything since before outputted to the browser, we session_start () must call.
You may want to pay close attention to one thing, we cross-site scripting (XSS) protection of the victim named variables, htmlspecialchars HTML entities which converts special characters () function is used . We also chat to login later be deployed in the event that will add a text variable.
A user is not logged in, and therefore not in a session to display the login form, we #wrapper div and script tags in your actual code around it and use a statement. On the contrary, they hide the login form, and the user is logged in and has created a session will show the chat box.;
Welcome to logout menu
We still chat login system for the application form are not finished. We still logging the user, and to end the chat session is needed to allow. If you can remember, our actual HTML markup included a simple menu. Go back to the menu that will give more functionality to add some PHP code.
First, the items include a welcome message to users. We do not write the username session.
1
<P class = "Welcome"> There, in the <b> <$ _SESSION php echo ['name'];?> </ B>
To log out and end user to allow session, we jump ahead of myself and will briefly use jQuery.
<Script type = "text / javascript">
// JQuery document
$ (Document) .ready (function () {
// If the user wants to end the session
$ ("# Exit"). ((Click event) {
Variable exit = confirm ("Do you really want to end the session?");
If (exit right ==) {window.location = 'index.php logout = true';}
});
});
</ Script>
If a user clicks on the link #exit simple jQuery code above shows a confirmation alert. The user decides to end the session, the exit is confirmed, then we = true? Index.php send them out. With the value of this simple truth creates a variable called logout. With PHP we need to catch this variable:
If (a isset ($ _ GET) ['out']) {
// Simple message exit
Of $ FP = fopen ("log.html", 'a');
of fwrite ($ FP, "<div class = 'msgln'> <i> user" $ _SESSION ['name'] "has left the chat session </ i> Archive </ DIV>." ..);
The fclose ($ FP);
session_destroy ();
Header ("Location: index.php only"); // Redirect the user
}
A gain of variable 'out' if we see now for the isset () function is using. Variable is passed through a URL, the link mentioned above, we proceed to User Name session.
session_destroy () function to destroy the session with the user name, we chat to log in to write a simple message to the exit. It will say that the user has left the chat session. As we will see later, our conversation will be configured log file log.html us, to manipulate the fwrite (), and fclose () functions to fopen () by using the . We for div 'msgln' have added a class note. We already CSS style for this div is appreciated.
After this, we destroy the session, and the login form will appear redirect the user to the same page.
Step 4: user input handling
After a user submits a form, we want to capture their input and write it to our chat log. In order to do this, we operate synchronously to the client and server sides should use jQuery and PHP.
jQuery,
We jQuery to handle their data almost everything to do with, jQuery post request to revolve around.
// If the user submits the form
$ ("# Submitmsg"). ((Click event) {
. Variable clientmsg = $ ("# usermsg") val ();
$. Post ("post.php", {text: clientmsg});
$ ("# Usermsg") attr ("value", "");
Return false;
});
Before we do anything, we take user input, or what they should occupy #submitmsg typed input. This value is set in a farm field, the Val () function, which can be accessed with. Now we clientmsg value stored in the variable.
jQuery post request: Here's the most important part of us. In a moment we will create a file in post.php sends a POST request. This customer input letters, or clientmsg variable has been saved.
Finally, we attribute by setting the value to blank #usermsg clear input.
JQuery code we put out here where our script tag, not that I would go.
PHP - post.php
Then we post.php post data sent each time the user submits the file form, and a new message is being sent. Our goal now capture this data, and we have to write it in the chat log.
Property ();
If (a isset ($ _ SESSION ['name'])) {
$ Text = $ _POST ['text'];
Of $ FP = fopen ("log.html", 'a');
of fwrite ($ FP, "<div class = 'msgln'> (" date ("G: I have a" ....) ") <b>" $ _ SESSION ['name'] "</ b> : ". stripslashes (htmlspecialchars ($ text))" Archives </ DIV> ");
The fclose ($ FP);
}
?>
Before we do this, we will use the user name as the session session_start () function to start post.php file.
'Name' is present for the session before doing anything else, you have to use isset boolean, we check.
We jQuery by now that the file being sent to capture the data. We store this data in $ text variable.
These figures, the overall user data as input, log.html file will be saved. To do this, we php.net opens the file for writing only in the 'A' fopen function, open the file with the mode, the file pointer at the end of the file. If the file does not exist, attempt to create it. Then we of fwrite () function using the file to write our message.
We will be writing to be enclosed within a .msgln div. The date and the date () function, the user name obtained through the session, and also to prevent XSS htmlspecialchars () function is sorrounded by the text, which will be included.
Finally, we turn to handle your file using fclose ().
Step 5: Start Chat (log.html) displaying content
User posted handle everything and posted using jQuery, PHP to communicate with the log is written. The only thing left to do to update the user has to show chat log.
If any content to save ourselves some time, we will preload #chatbox div chat log.
<Div's ID = "chatbox"> <PHP
If (file_exists ("log.html") && File ("log.html")> 0) {
The $ = fopen ("log.html", "R") to the handle;
Of $ contents = fread ($ handle, file ("log.html"));
The fclose ($ handle);
Echo $ contents;
}
?> </ Div's>
We are reading and writing the contents of the file, except this time, post.php file as we use a similar routine.
Application jQuery.ajax
AJAX request is the basis of everything we are. This application not only send us throught form without page allows you to get the data, but also allows the application to handle the data.
// Load the file containing the chat log
{) (LoadLog work
$ .ajax ({
URL: "log.html",
Cache: false,
Success: function (HTML) {
. $ ("# Chatbox") HTML (HTML); // Enter the chat log in #chatbox div
},
});
}
Our AJAX request we wrapped inside a function. You'll see why in a second. As you see above, we will use jQuery AJAX request three items.
URL: URL request string. Log.html our chat we will use for the log file name.
Cache: This saved file will prevent us from being. This is an application of the latest chat log will ensure that every send.
sucess: This will move the data to the application that will allow you to attach an event.
As you see, we #chatbox div so we requested data (HTML) move.
Auto Scrolling
In other chat applications can be seen as a chat log of container (#chatbox) If overflows scroll down automatically. We first AJAX request and compare the height of the container and feature a simple, are going to apply. Scroll height is greater after application, so influential in #chatbox div will use jQuery to scroll to.
// Load the file containing the chat log
{) (LoadLog work
Variable oldscrollHeight = $ ("# chatbox") attr ("scrollHeight") - 20 .; // Scroll height before application
$ .ajax ({
URL: "log.html",
Cache: false,
Success: function (HTML) {
. $ ("# Chatbox") HTML (HTML); // Enter the chat log in #chatbox div
// Auto-scroll
Variable newscrollHeight = $ ("# chatbox") attr ("scrollHeight") - 20 .; height after application // Scroll
If (newscrollHeight> oldscrollHeight) {
$ ("# Chatbox") animate ({scrollTop: newscrollHeight}, 'normal'); div to the bottom // Autoscroll
}
},
});
}
We oldscrollHeight we first before requesting combo #chatbox div height stored in the variable.
Since our application is successful return, we newscrollHeight scrolle of #chatbox div height stored in the variable.
We then described using a combo height compare both variables. newscrollHeight oldscrollHeight is great, so we use influential #chatbox div to scroll to.
Updated continuously chat
Now a new data being sent back and forth between customers how we will continuously update, which may arise? Or to rephrase the question, how we constantly updating data will keep sending requests?
setInterval (loadLog, 2500); // reload the file every 2500 ms or x-ms If you want to change other parameters
Our answer lies in setInterval function. Almost every 2.5 seconds, our loadLog () function will be executed, and loadLog div autoscroll function application and will update the file.
Finishes
We're finished! A basic communication system is how it works hope that you have learned, and if you have any suggestions on anything, I would gladly welcome them. You can get with a chat application as it is a simple chat system. If you ect, add emoticons, add an administrative backend, away from work and can build multiple chat rooms. The sky is the limit here.
The chat application that you're thinking of expanding may want to check if there are a few links:
Form to secure your forms with buttons - XSS (cross site scripting) and cross-site request forgery prevention prevent
Expanding on our AJAX request - jQuery Using submit a form without page refresh
With raw JavaScript to AJAX requests - how applications work behind the scenes with raw JavaScript learn how.


.png)


.png)


